Conservation Subdivision
- Adobe Suite
- AutoCAD
- Digital Graphics
- GIS Analysis
- Research
- Stormwater
Creating this conservation subdivision was a multi-step process that improved my AutoCAD, ArcGIS, and Adobe Illustrator skills. My two teammates and I started by creating a subdivision yield plan that maximized the number of parcels. We then completed a series of sensitive area overlay maps, followed by a designation of priority conservation zones. With this information we created a new subdivision that maximized open space and clustered density away from areas that we identified as being ecologically significant.
After designing our conservation subdivision as a team, I individually designated eight different stormwater treatment zones based on development density, topography, and soil type. The treatment zones and associated stormwater treatment train strategies are shown to the right. The diagram below follows the movement of water as it enters the system and as rain and leaves the system through infiltration or Honey Creek.

Sensitive areas analysis (group work)
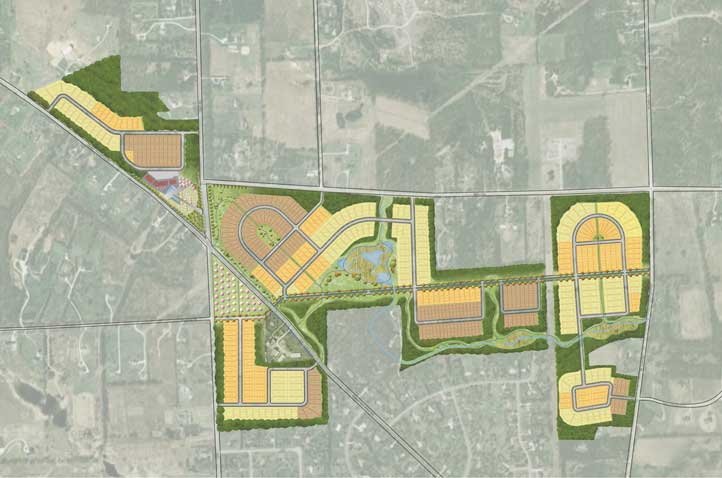
Conservation subdivision design with 25% open space (group work)
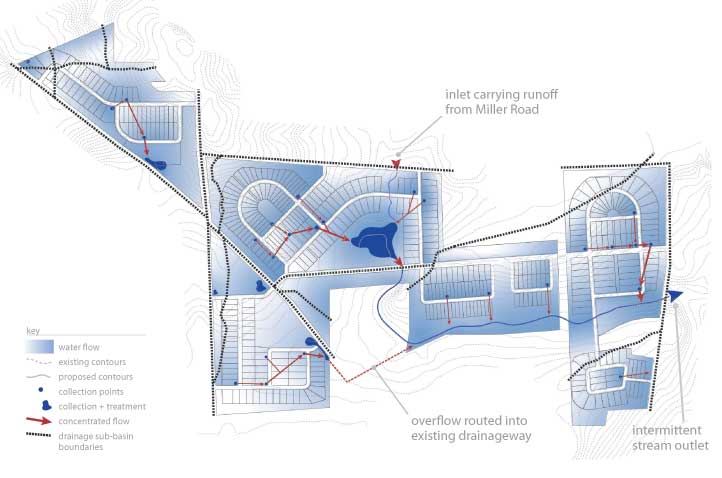
On-site hydrology
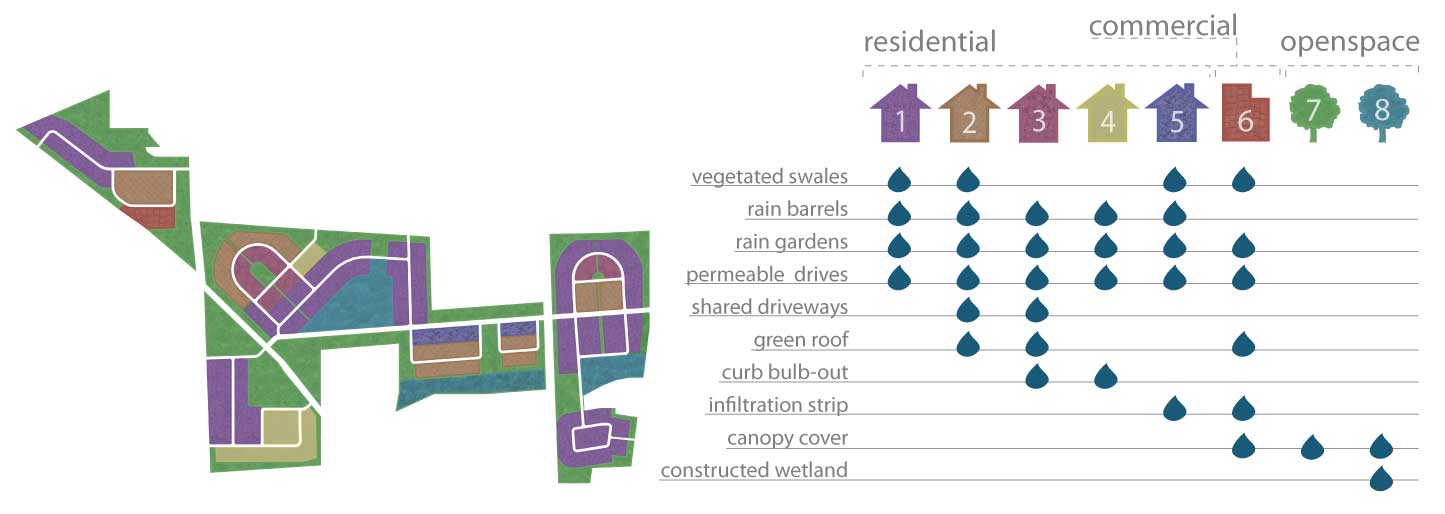
Stormwater treatment zones based on topography, density, and soil type
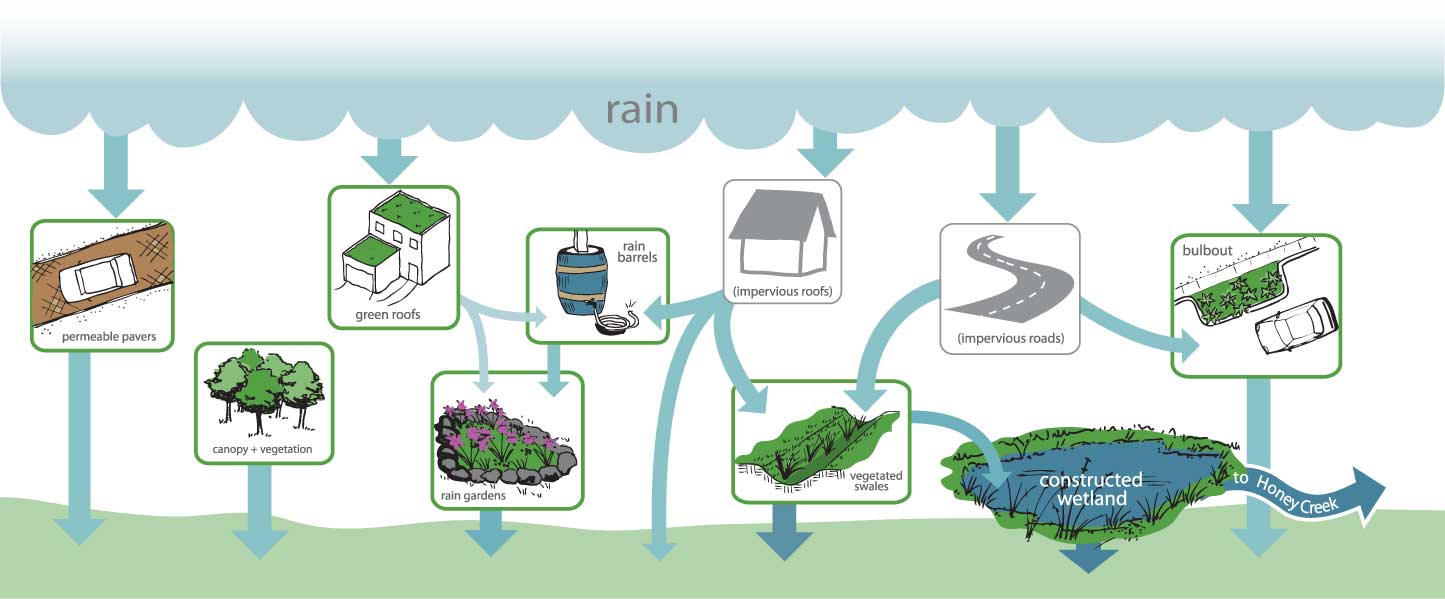
Diagram showing the flow of rain and stormwater as it moves through the site
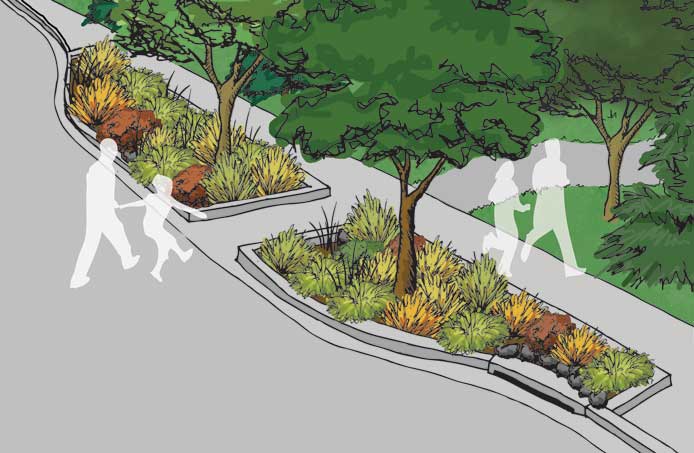
Curb bulb-outs filter runoff and reduce crossing distance
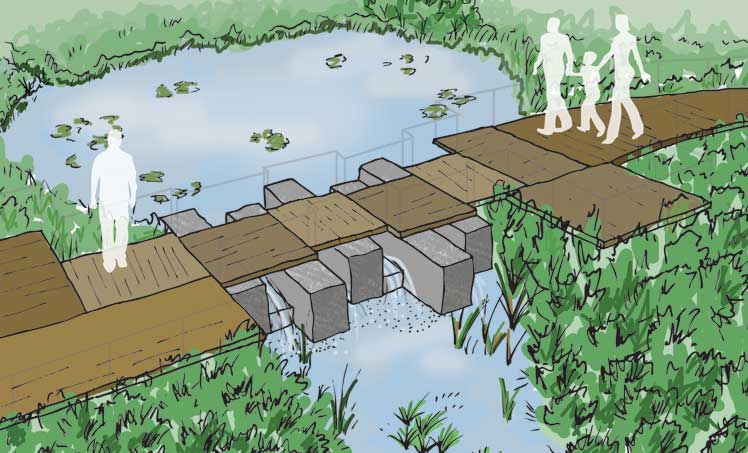
Boardwalk over the sediment forebay + wetland
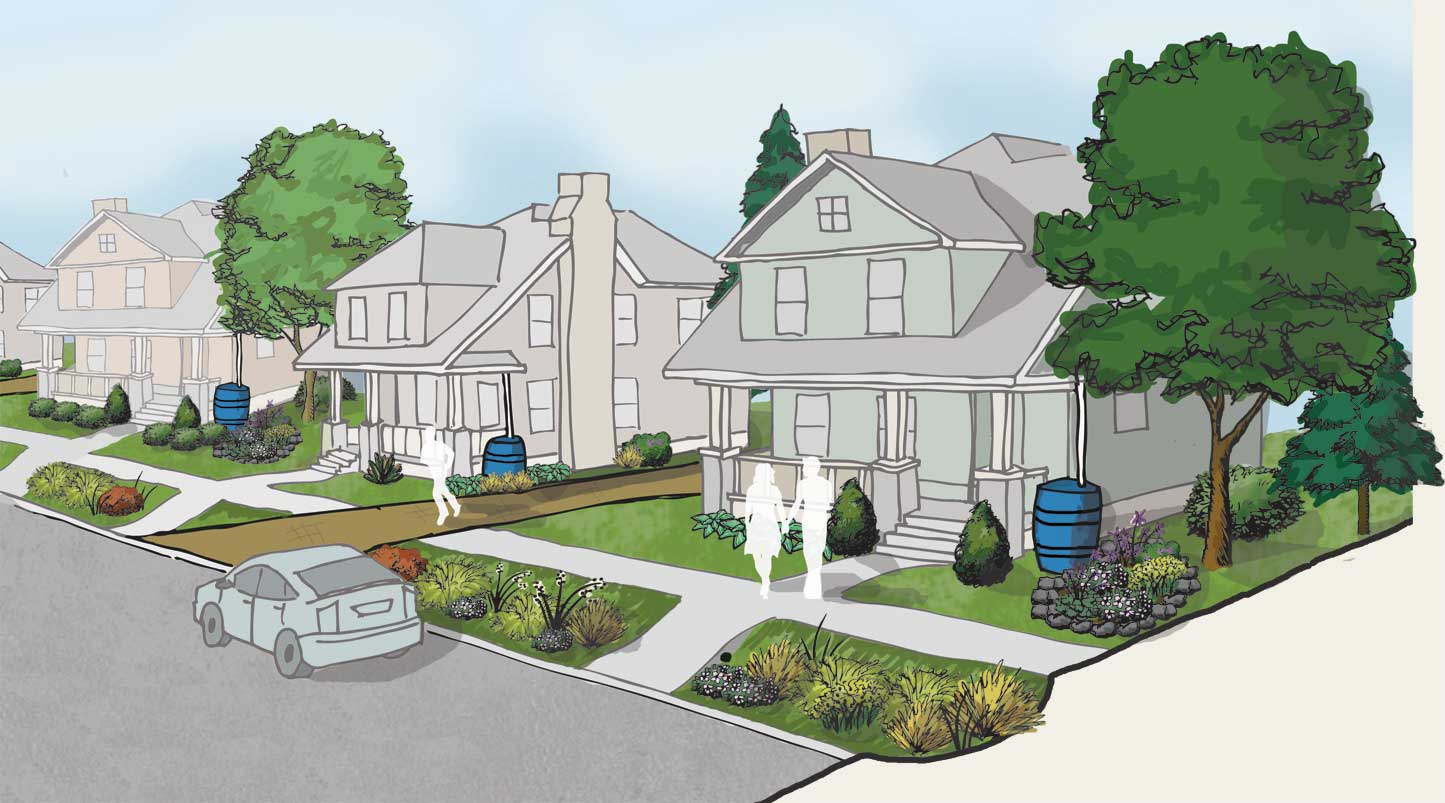
Residential treatments include a bioswale, rain gardens and barrels, and permeable, shared driveways